DIY RV Roof Maintenance: Our Guide to Safe Caravan Vent Lid Replacement
Working at heights? Even simple jobs like safely replace a caravan vent lid need a plan. Here’s what we did. Words and photos Rachael Doherty.
Our pop-top Jayco camper trailer roof needed a wash and replace the caravan vent lid replaced as it was brittle and cracked. Finding the part and doing the job seemed easy enough. But could I perform a two-handed job at heights myself? How do I reach it safely?
Assessing Your Workspace for Safe RV Roof Access
My Working Space Safe Work Australia recommends working from ground height, where possible. Extension poles certainly help. But I wanted to focus time and attention on cleaning the roof and, hopefully, replace the vent lid 1.5m from ground up, so I weighed up my risks. Working on the RV roof was out of the question. Luckily, our two-car wide stippled concrete driveway provided room and support on all sides for a raised working platform–away from foot traffic behind our gate.
I parked the van clear of the powered overhead service line. I then levelled it, applied the handbrake, dropped the stabilisers and fitted wheel chocks.
Trestles versus Ladders
Next, the raised working platform. I quickly vetoed our A-frame ladder as they’re for short-term use only, require 3 points of contact (two feet and a hand or your torso, for example) and the temptation to lean dangerously to chase the seam was too great. SafeWork NSW discusses when how to safely use ladders here.
AS-approved trestles and beams or a platform ladder may suit your situation better. SafeWork NSW explains their use. Whichever platform you choose, you need to ask: Is it the safest option? Is it designed for the job? Is it in good nick? Am I wearing the right gear? Am I physically able to use it? Safe Work Australia produced some great info on managing the risks.
A Step-by-Step Guide to Replacing an RV Vent Lid
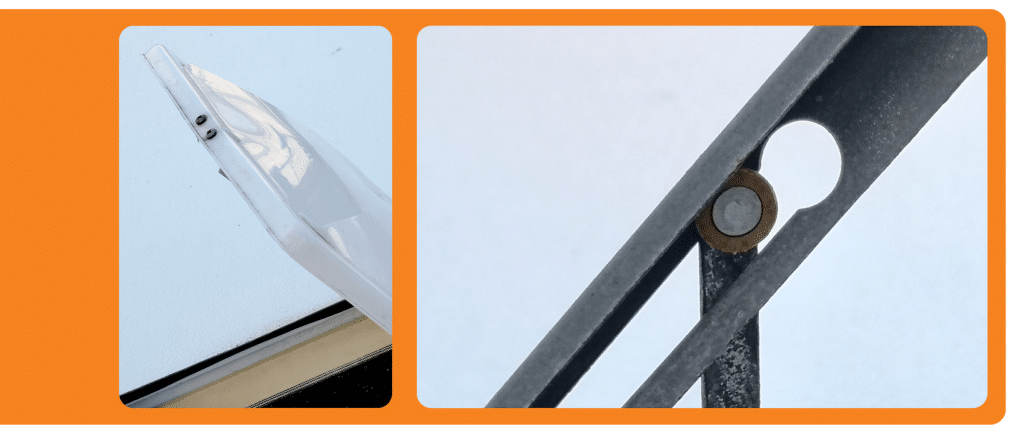
Feeling confident on the plaster trestle, I inspected the vent lid screws and decided I could replace the lid. I photographed the hinge and lid to identify the part: the New-style Jensen 14in x 14in vent–widely adopted from the mid-90s–and confirmed its availability online.
Thinking through the Job
As my camper roof lifts, I read instructions online to see if any steps performed inside would interfere with accessing the roof part-way through the job. No, just open the vent at the start.
I then raised the roof slightly to see if I could open the hatch. Yes, no further setup. So I placed a foam tile beneath the vent to catch any dust, opened the vent and closed the camper.
Inspecting the RV Vent Lid
With my concerns allayed, I purchased the lid. New-style Jensen RV vent lids comprising a cover with a moulded hinge that attaches to the vent and fitted with a metal track for the vent’s crank arm. This one from CAMCO, RV Vent Lid part no. 40153, is rust-resistant and made from UV-stabilised polypropylene.
Dismantling the Old Lid
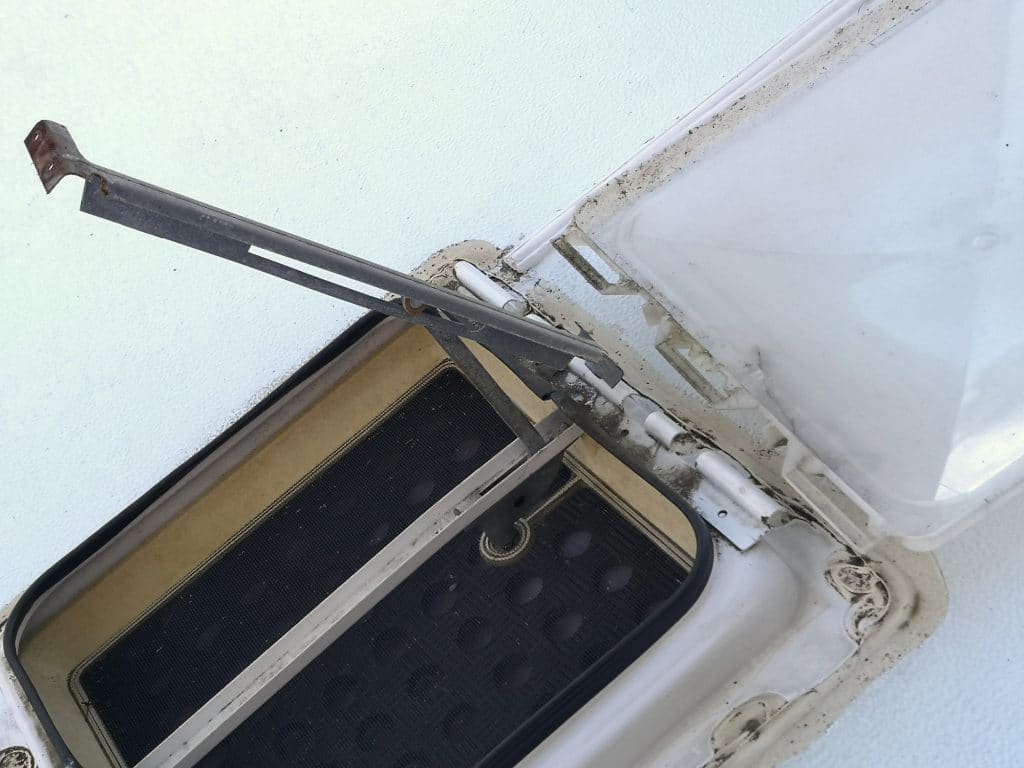
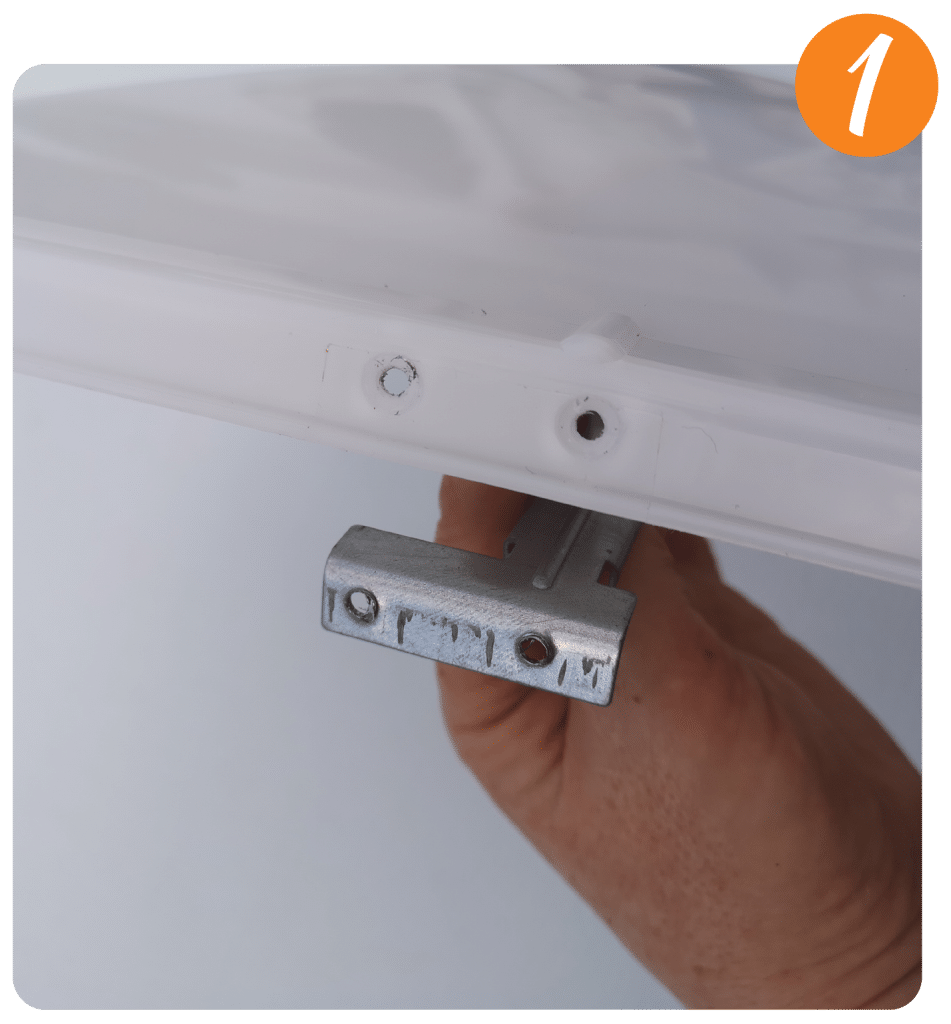
Back on the trestle, it was time to dismantle the old vent lid. I unscrewed the two Phillips screws at the front of the vent that hold the metal track in place. I could now pull the metal track free from the hinge. Then, it was time to unhook the vent’s crank arm from the track.
Removing the Old Lid
Now that the plastic lid could pivot freely on the hinge, I laid it flat on the camper roof to separate it from the hinge.
Fitting the New Lid
To fit the new lid, I simply reversed the process: unscrewing the lid’s track at one end; sliding the new cover onto the hinge; attaching the crank arm to the track; then screwing the track into place. I was then ready to open the camper to close the vent. Time to pack up.